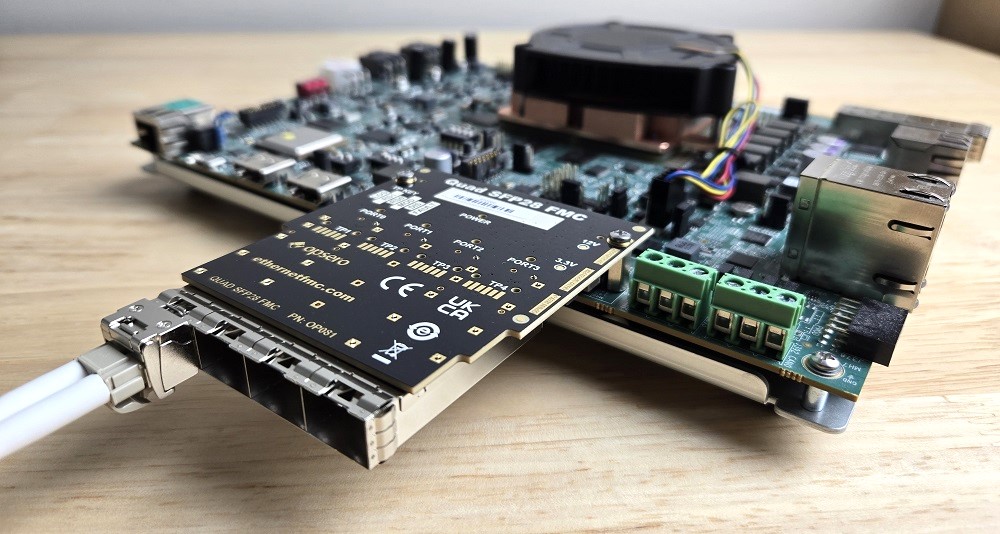
In this post we’re going to build and run our new multi-port 25G Ethernet reference design for Versal boards and the Opsero Quad SFP28 FMC. The design is based on the AMD Xilinx 10G/25G Ethernet Subsystem IP. Specifically, we’re going to boot PetaLinux on the VEK280 and establish a 25G Ethernet connection between it and a 25G network adapter that is installed in a Ubuntu PC. We’re doing this on Versal board VEK280 which is one of the few AMD FPGA-containing devices that can support 25G Ethernet at the time of writing. The instructions can also be applied to Versal boards VCK190, VMK180 and VPK120; there is a reference design for all of these boards in the Github repo.
Reference design
Requirements
- Linux PC
- Vivado 2024.1
- PetaLinux 2024.1
- License to generate bitstream for VEK280/VCK190/VMK180/VPK120
- License to generate 10G/25G Ethernet Subsystem IP
The Versal boards are not supported by the free version of the AMD Xilinx tools, but you can download an evaluation license that will allow you to build these projects. Likewise you can obtain an evaluation license for the 10G/25G Ethernet Subsystem IP by clicking the “Evaluate IP” link on the product page. You must have installed these eval licenses before running the build scripts below.
Build instructions
These are the instructions for building the design from sources.
-
On a Linux machine (physical or virtual), source the Vivado and PetaLinux 2024.1 tools:
source <path-to-vivado-install>/2024.1/settings64.sh source <path-to-petalinux-install>/2024.1/settings.sh -
Clone the repo:
git clone https://github.com/fpgadeveloper/sfp28-fmc-xxv -
Build the target design:
cd sfp28-fmc-xxv/PetaLinux
make petalinux TARGET=vek280_25g
In the above example we’re building the vek280_25g target design, but you can choose from these other Versal designs too:
25G designs
| Target design | Board | Link speed | FMC Connector |
|---|---|---|---|
vck190_fmcp1_25g |
VCK190 | 25G | FMCP1 |
vck190_fmcp2_25g |
VCK190 | 25G | FMCP2 |
vek280_25g |
VEK280 | 25G | FMCP |
vmk180_fmcp1_25g |
VMK180 | 25G | FMCP1 |
vmk180_fmcp2_25g |
VMK180 | 25G | FMCP2 |
vpk120_25g |
VEK280 | 25G | FMCP |
10G designs
| Target design | Board | Link speed | FMC Connector |
|---|---|---|---|
vck190_fmcp1 |
VCK190 | 10G | FMCP1 |
vck190_fmcp2 |
VCK190 | 10G | FMCP2 |
vek280 |
VEK280 | 10G | FMCP |
vmk180_fmcp1 |
VMK180 | 10G | FMCP1 |
vmk180_fmcp2 |
VMK180 | 10G | FMCP2 |
vpk120 |
VEK280 | 10G | FMCP |
Hardware setup
Requirements
The hardware we’re going to use to test the reference design is the following:
- 1x PC with 10G/25G capable Network adapter
- 1x VEK280, VCK190, VMK180 or VPK120
- 1x Quad SFP28 FMC
- 2x 25G SFP28 modules
- 1x Fiber optic patch cable
- Alternatively: 1x DAC cable (photo below)
For a network adapter, I’m using the Intel E810-XXVDA2 10/25GbE network adapter that is plugged into a Lenovo ThinkStation P910 running Ubuntu 20.04 LTS. It has two ports, the first of which has 1x 25G SFP28 module installed.
For the 25G SFP28 module, I’m using StarTech SFP-25G-SR-S-M-ST SFP28 modules and FLYPROFiber OM3 LC-to-LC Multimode Fiber Patch Cable, both purchased on Amazon (see photos below).

These are optical modules but you can use a copper SFP28 DAC cable if you prefer, just make sure that it can support the link speed that you are using.

Below you can see the fiber optical patch cable. I’m using a short one which is long enough to go between my PC and the VEK280. The SFP28 module used will determine the maximum length that you can use.

Below is a photo of a DAC cable (10Gtek, PN: CAB-ZSP/ZSP-P0.5M) that you can use as an alternative to optical SFP28 modules + fiber. They can be a bit less complicated but they don’t have the range that fiber does, so they don’t tend to be very long.

Setup instructions
-
Attach the Quad SFP28 FMC to the FMCP connector of the VEK280. If you are using the VCK190 or VMK180, just make sure that you connect to the FMCP connector for which the target design was built (FMCP1 or FMCP2).
-
Attach one 25G SFP28 module to the first port (PORT 0) of the Quad SFP28 FMC.
-
Attach one end of the optical patch cable to the 25G SFP28 module, and the other end to the module that is installed in the network adapter.
-
Connect the power supply to the VCK190/VMK180 board and the USB cable. The other end of the USB cable should be connected to a PC with a UART terminal program.
-
Switches (1-4 of SW1) of the Versal board should be set to 1000 (ON-OFF-OFF-OFF). This sets the board to boot from SD card.

Launch instructions
-
Copy the boot files to the SD card as described here: Prepare the SD card.
-
Plug the SD card into the Versal SD card slot. Note that the VCK190/VMK180 board has two SD card slots, one for the Versal configuration and the other for the system controller (Zynq UltraScale+). The Versal SD card slot is the one that is on the top/component side of the board. You can leave the system controller SD card slot empty.

-
Open up a terminal console such as Putty and configure it for the UART port of the Versal board. The baud rate should be set to 115200 bps.
-
Power up the board and wait for the PetaLinux boot sequence to complete. One important thing that you want to see is that the Si5328 clock generator gets probed and configured. The Si5328 is on the Quad SFP28 FMC and generates the 156.25MHz reference clock for the GT Quad to which the SFP28 ports are connected. The corresponding lines of the boot log are the following:
[    3.827164] si5324 7-0068: si5328 probed
[    3.899161] si5324 7-0068: si5328 probe successful
The parts of the boot log that are related to the Ethernet ports are shown below:
[   10.606488] xilinx_axienet 80030000.ethernet eth3: XXV MAC block lock not complete! Cross-check the MAC ref clock configuration
[   10.618060] xilinx_axienet 80030000.ethernet eth3: configuring for inband/25gbase-r link mode
[   10.811860] macb ff0c0000.ethernet eth4: PHY [ff0c0000.ethernet-ffffffff:01] driver [ADIN1300] (irq=POLL)
[   10.821472] macb ff0c0000.ethernet eth4: configuring for phy/rgmii-id link mode
[   11.053720] macb ff0c0000.ethernet: gem-ptp-timer ptp clock registered.
[   11.145668] xilinx_axienet 80010000.ethernet eth1: XXV MAC block lock not complete! Cross-check the MAC ref clock configuration
[   11.145717] xilinx_axienet 80010000.ethernet eth1: configuring for inband/25gbase-r link mode
[   11.189944] xilinx_axienet 80000000.ethernet eth0: configuring for inband/25gbase-r link mode
[   11.193710] xilinx_axienet 80000000.ethernet eth0: Link is Up - 25Gbps/Full - flow control off
[   11.229713] xilinx_axienet 80020000.ethernet eth2: XXV MAC block lock not complete! Cross-check the MAC ref clock configuration
[   11.229753] xilinx_axienet 80020000.ethernet eth2: configuring for inband/25gbase-r link mode
If you want to see the entire boot log, you can download it here.
-
Login to PetaLinux using the username
petalinux. You will be asked to choose a password and then to enter it a second time.
In this design, there are 5 Ethernet interfaces: the 4x 25G Ethernet ports of the Quad SFP28 FMC plus the Versal board’s own 1G Ethernet port. The table below illustrates the interface configuration.
| Interface | Link speed | Description |
|---|---|---|
eth0 |
25Gbps | Quad SFP28 FMC PORT 0 |
eth1 |
25Gbps | Quad SFP28 FMC PORT 1 |
eth2 |
25Gbps | Quad SFP28 FMC PORT 2 |
eth3 |
25Gbps | Quad SFP28 FMC PORT 3 |
eth4 |
10/100/1000bps | On-board Ethernet port |
Note that unless they are connected to a DHCP server, they will not automatically have an IP address assigned to them. In my case, only PORT0 is connected, and it connects directly to the 25G network adapter of my PC, therefore no IP address is assigned and I must assign it manaully.
Set a fixed IP address
-
Once you’re logged into PetaLinux, use
ifconfigto check if any of the Ethernet interfaces have IP addresses.vek280-sfp28-2024-1:~$ ifconfig eth0 Link encap:Ethernet HWaddr 00:0A:35:00:00:00 inet6 addr: fe80::20a:35ff:fe00:0/64 Scope:Link UP BROADCAST RUNNING MTU:1500 Metric:1 RX packets:20 errors:0 dropped:0 overruns:0 frame:0 TX packets:37 errors:0 dropped:0 overruns:0 carrier:0 collisions:0 txqueuelen:1000 RX bytes:1896 (1.8 KiB) TX bytes:8712 (8.5 KiB) eth1 Link encap:Ethernet HWaddr 00:0A:35:00:00:01 UP BROADCAST MTU:1500 Metric:1 RX packets:0 errors:0 dropped:0 overruns:0 frame:0 TX packets:0 errors:0 dropped:0 overruns:0 carrier:0 collisions:0 txqueuelen:1000 RX bytes:0 (0.0 B) TX bytes:0 (0.0 B) eth2 Link encap:Ethernet HWaddr 00:0A:35:00:00:02 UP BROADCAST MTU:1500 Metric:1 RX packets:0 errors:0 dropped:0 overruns:0 frame:0 TX packets:0 errors:0 dropped:0 overruns:0 carrier:0 collisions:0 txqueuelen:1000 RX bytes:0 (0.0 B) TX bytes:0 (0.0 B) eth3 Link encap:Ethernet HWaddr 00:0A:35:00:00:03 UP BROADCAST MTU:1500 Metric:1 RX packets:0 errors:0 dropped:0 overruns:0 frame:0 TX packets:0 errors:0 dropped:0 overruns:0 carrier:0 collisions:0 txqueuelen:1000 RX bytes:0 (0.0 B) TX bytes:0 (0.0 B) eth4 Link encap:Ethernet HWaddr 9A:1B:20:2F:B8:36 UP BROADCAST MULTICAST MTU:1500 Metric:1 RX packets:0 errors:0 dropped:0 overruns:0 frame:0 TX packets:0 errors:0 dropped:0 overruns:0 carrier:0 collisions:0 txqueuelen:1000 RX bytes:0 (0.0 B) TX bytes:0 (0.0 B) Interrupt:38 lo Link encap:Local Loopback inet addr:127.0.0.1 Mask:255.0.0.0 inet6 addr: ::1/128 Scope:Host UP LOOPBACK RUNNING MTU:65536 Metric:1 RX packets:82 errors:0 dropped:0 overruns:0 frame:0 TX packets:82 errors:0 dropped:0 overruns:0 carrier:0 collisions:0 txqueuelen:1000 RX bytes:6220 (6.0 KiB) TX bytes:6220 (6.0 KiB) -
Set the IP address for PORT 0 (
eth0).vek280-sfp28-2024-1:~$ sudo ifconfig eth0 192.168.1.50 vek280-sfp28-2024-1:~$ -
Check that the IP address was set.
vek280-sfp28-2024-1:~$ ifconfig eth0 eth0 Link encap:Ethernet HWaddr 00:0A:35:00:00:00 inet addr:192.168.1.50 Bcast:192.168.1.255 Mask:255.255.255.0 inet6 addr: fe80::20a:35ff:fe00:0/64 Scope:Link UP BROADCAST RUNNING MTU:1500 Metric:1 RX packets:20 errors:0 dropped:0 overruns:0 frame:0 TX packets:48 errors:0 dropped:0 overruns:0 carrier:0 collisions:0 txqueuelen:1000 RX bytes:1896 (1.8 KiB) TX bytes:12204 (11.9 KiB) vek280-sfp28-2024-1:~$ -
Test the port with
ping. In my case, I know that the 25G interface on my network adapter has been configured with a fixed IP address of192.168.1.10, so I can use the ping command to test the connection between the VEK280 and the PC. You will have to use the IP address of your own network adapter.vek280-sfp28-2024-1:~$ ping 192.168.1.10 PING 192.168.1.10 (192.168.1.10): 56 data bytes 64 bytes from 192.168.1.10: seq=0 ttl=64 time=0.328 ms 64 bytes from 192.168.1.10: seq=1 ttl=64 time=0.183 ms 64 bytes from 192.168.1.10: seq=2 ttl=64 time=0.193 ms 64 bytes from 192.168.1.10: seq=3 ttl=64 time=0.176 ms 64 bytes from 192.168.1.10: seq=4 ttl=64 time=0.184 ms 64 bytes from 192.168.1.10: seq=5 ttl=64 time=0.174 ms ^C --- 192.168.1.10 ping statistics --- 6 packets transmitted, 6 packets received, 0% packet loss round-trip min/avg/max = 0.174/0.206/0.328 ms vek280-sfp28-2024-1:~$ -
Check the link speed with
ethtool. The PetaLinux build of this reference design includes ethtool which is useful for debugging Ethernet links. In this case I just want confirmation that the negotiated link speed is indeed 25Gbps.vek280-sfp28-2024-1:~$ sudo ethtool eth0 Settings for eth0: Supported ports: [ MII ] Supported link modes: 25000baseCR/Full 25000baseKR/Full 25000baseSR/Full Supported pause frame use: Symmetric Receive-only Supports auto-negotiation: Yes Supported FEC modes: Not reported Advertised link modes: 25000baseCR/Full 25000baseKR/Full 25000baseSR/Full Advertised pause frame use: Symmetric Receive-only Advertised auto-negotiation: Yes Advertised FEC modes: Not reported Speed: 25000Mb/s Duplex: Full Auto-negotiation: on Port: MII PHYAD: 0 Transceiver: internal Link detected: yes vek280-sfp28-2024-1:~$
Other boards with 25G support
There are a few other AMD Xilinx boards that have gigabit transceivers that can support 25G Ethernet and I’ve listed them in the table below. As you can see, we’re still working hard to build ref designs for all of these platforms, and I’ll update this table as they become available.
| Board | FMC Compatibility | Ref design available |
|---|---|---|
| Zynq UltraScale+ RFSoC ZCU111 | ✅ Quad SFP28 FMC | ✅ Github repo |
| Zynq UltraScale+ RFSoC ZCU208 | ✅ Quad SFP28 FMC | ✅ Github repo |
| Zynq UltraScale+ RFSoC ZCU216 | ✅ Quad SFP28 FMC | ✅ Github repo |
| Kintex UltraScale+ KCU116 | ✅ Quad SFP28 FMC | ❌ Coming soon |
| Virtex UltraScale+ VCU118 | ✅ Quad SFP28 FMC | ❌ Coming soon |
| Virtex UltraScale+ VCU128 | ✅ Quad SFP28 FMC | ❌ Coming soon |
| Versal AI Core VCK190 | ✅ Quad SFP28 FMC | ✅ Github repo |
| Versal AI Edge VEK280 | ✅ Quad SFP28 FMC | ✅ Github repo |
| Versal HBM VHK158 | ✅ Quad SFP28 FMC | ✅ Github repo |
| Versal Prime VMK180 | ✅ Quad SFP28 FMC | ✅ Github repo |
| Versal Premium VPK120 | ✅ Quad SFP28 FMC | ✅ Github repo |
| Versal Premium VPK180 | ✅ Quad SFP28 FMC | ✅ Github repo |
Designed for developers

We design all of our products with the user experience in mind. With this product we also made a big effort to achieve broad compatibility, as you can probably tell by the table above. It has level translators to support VADJ voltages between 1.2V and 2.5V. It provides the carrier board with access to all of the SFP28 I/Os and it also has one bi-color LED per port which can be driven by the FPGA design for whatever purpose you choose. We’ve also made debugging easy by putting test points on the board for probing all power supplies and the SFP28 I/Os (not including the high-speed signals).
I’m hoping that you find this product and the reference designs useful for your high-speed Ethernet projects. If you have any feedback to share or questions about the product, please get in touch. Otherwise, here are the useful links:
- Where to buy: Digi-Key (PN: OP081)
- Datasheet: Quad SFP28 FMC
- Reference designs: Github repo